
INTRODUCTION
How To Make Cold Brew Coffee at Home
How To Make Brew Cold Coffee At Home .It all started on a really hot afternoon. I was walking home, sweaty and tired, and stopped by this little café near my place. I ordered a cold brew Best Cold Coffee Near Me, mostly just to cool down—but wow. It was smooth, strong, and way less bitter than the iced coffee I was used to. I was instantly hooked.
But after a few days of buying it again and again, I realized… this was getting expensive. So I thought, “Can I make this at home?” Spoiler alert: yes, and it’s way easier than I expected. How To Make Brew Cold Coffee At Home.
Now I make a big jar of cold brew every week, and honestly, it’s become part of my routine. If you’ve been curious about making it yourself, I’ve got you covered. I’ll walk you through the exact steps I use—no fancy tools, no complicated stuff. Just simple, tasty cold brew you can make right in your kitchen.

Step 1: Pick Your Coffee (Nothing Fancy Needed)
When I first tried making cold brew, I honestly just used whatever coffee I had in the cupboard. It was okay—but not great. After a few tries, I realized the type of coffee makes a big difference.
Here’s what I learned: medium or dark roast works best. Cold brew brings out the smooth, chocolatey flavors in darker beans, and it’s way less bitter than hot coffee.
You don’t need to spend a lot. I’ve used a $6 grocery store bag and it turned out great. If you have a favorite coffee you already drink, try starting with that.
What I do now: I buy whole beans and grind them myself. Just a quick coarse grind—not too fine. But if you don’t have a grinder, no worries. Most stores will grind it for you—just ask them to grind it for a French press or cold brew. That’s the perfect texture.
Step 2: Grinding the Coffee – Keep It Chunky and Easy
Okay, real talk—this step confused me at first. I thought, “It’s just coffee, right? Grind it and pour some water on top.” But turWhen I first tried cold brew, I used finely ground coffee—the kind you’d use in a regular drip machine. Big mistake. It made the coffee muddy, kind of bitter, and it was a pain to strain. I ended up with coffee sludge at the bottom. Not fun.
Here’s what I do now: I use whole beans and grind them myself right before making a batch. I don’t have an expensive grinder—just a simple one from Amazon. I give it a few short pulses until it looks rough and uneven. That’s totally fine. Cold brew isn’t picky.
And if you don’t have a grinder? No problem. Just buy pre-ground coffee labeled “coarse” or ask your local coffee shop to grind it for cold brew. They’ll know what to do.
Step 3: Mixing the Coffee and Water (It’s Easier Than You Think)
so once you’ve got your coarse coffee ready, it’s time to mix it with water. I remember the first time I did this—I actually thought I’d mess something up, but it’s honestly one of the easiest parts.
I used a big glass jar I had lying around (you don’t need anything fancy). I just dumped in 1 cup of ground coffee, then slowly poured in about 4 cups of water. Don’t pour it all in super fast—if you do, the coffee just floats on top and doesn’t soak right. So I pour a little, give it a stir, pour more, stir again.
I use a spoon or a wooden stick—whatever’s clean and nearby. I don’t stress about it being perfect. You just want all the coffee to get wet.
At first, it kind of looks gross—like muddy water. That’s normal. It’s gonna sit for hours anyway. Once it’s all mixed, I put the lid on the jar (or you can use plastic wrap), and I stick it in the fridge.
You can leave it on the counter too—I’ve done both. As long as it sits for 12 to 18 hours, it works. I usually make it at night so it’s ready the next day.
No noise, no machines, no heat. Just coffee and water doing their thing while you sleep. It’s kind of satisfying, honestly.
Step 4: Straining the Coffee (No Fancy Tools Needed)
Alright, it’s the next day. You’ve got this dark, rich-looking jar of steeped coffee sitting there, and now it’s time to separate the liquid gold from the grounds.
This part used to stress me out a little. I didn’t have any fancy strainer or coffee gear at home. But you really don’t need much.
Here’s what I do:
I take another clean jar or pitcher (whatever I’m going to store the cold brew in), and I grab a fine mesh strainer. If I want it extra smooth, I line the strainer with a paper towel, cheesecloth, or even a clean dish towel. That catches the tiny bits.
Then I just pour the coffee through slowly. Sometimes I have to do it in two parts because the jar is full. You’ll notice some of the coffee grounds clump at the bottom—don’t try to scrape them out. Just let them stay there. It’s not worth the mess.
Pro tip from my own mistakes:
Don’t squeeze the coffee grounds trying to “get more out of it.” I tried that once—ended up with bitter, cloudy cold brew. Just let gravity do the work. Be patient. It’s worth it.
Once it’s strained, you’ve got clean, smooth cold brew concentrate in your new container. Put a lid on it and pop it in the fridge—it’ll stay fresh for up to a week, maybe longer.
Step: 5 How To Make Cold Brew Coffee, No Fuss: The Easiest Coffee You’ll Ever Love
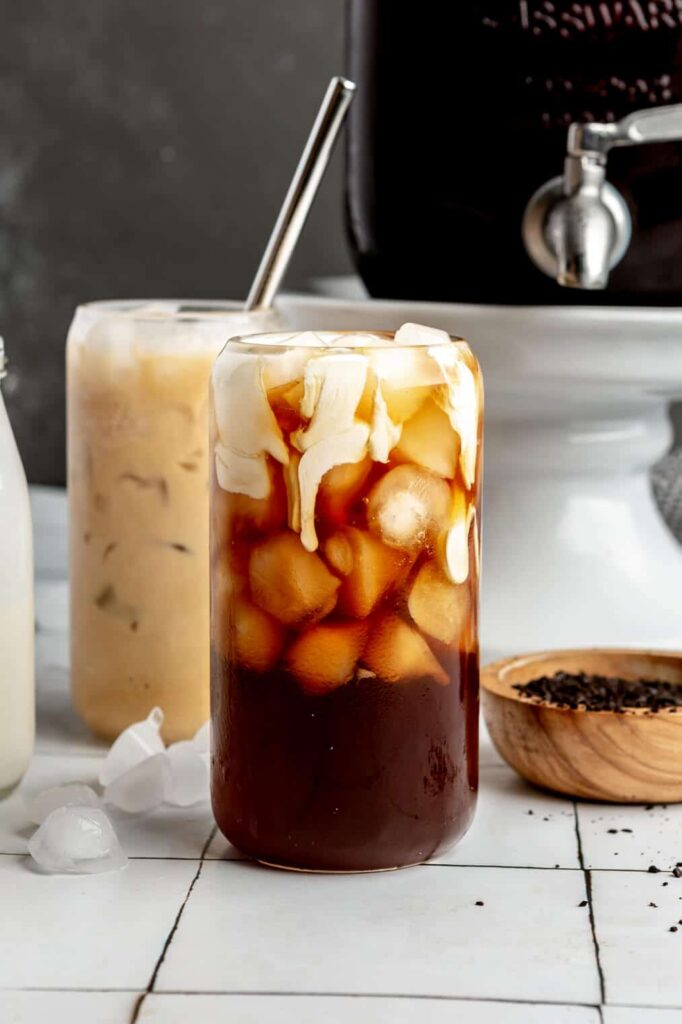
I didn’t plan to fall in love with cold brew. It just sort of… happened. One quiet morning, a leftover jar of coffee in the fridge, a glass full of ice, and suddenly—everything made sense. No machine, no measurements, no rules. Just good coffee, How To Make Brew Cold Coffee At Home. the kind that makes your morning feel like it’s already a win.
It looked dark and kinda mysterious. I hadn’t touched it since the night before.
I pulled it out, grabbed whatever clean glass I could find, filled it with ice, and poured the coffee in. No measurements, no overthinking. Just enough to cover the ice. I added a bit of water, gave it a swirl with a spoon, and took a sip.
And… I actually stopped in my tracks.
It was cold, smooth, strong—but not harsh. It didn’t punch me in the face like hot coffee sometimes does. It just felt easy. Like, yep, I needed that.
I literally stood in my kitchen in my socks, holding that glass, thinking, Why did I wait so long to try this?
There was no noise. No rush. Just a quiet morning and a really good cup of coffee that I made myself—with no machine, no fancy gear, no expert skills. Just me and a little bit of patience.
Now I make it every week. Not because I’m some coffee expert, but because it works. It fits. It’s simple. I wake up, pour a glass, and it feels like a small win before the day even begins.
And that? That’s worth a lot.
Conclusion: How To Make Cold Brew at Home? Totally Worth It
Honestly, I didn’t think making cold brew at home would be a big deal. I just wanted to try it once, maybe save a little cash.
But now? I kind of love it.
It’s easy, it tastes way better than I expected, and it saves me from standing in line at coffee shops. I don’t need anything fancy—just coffee, water, and a bit of fridge space.
Now it’s part of my routine. I make a batch, keep it in the fridge, and eve
ry morning How To Make Brew Cold Coffee At Home I’ve got good coffee ready to go. No stress, no mess.
So yeah, if you’ve been thinking about trying it—do it. You’ll be surprised how simple it is, and honestly, once you taste that first glass, you might not go back.
Pingback: How to Choose the Right Coffee - My site
Pingback: Seasonal Coffee Drinks You Need to Try This - My site
Pingback: Best Coffee in India - My site
Pingback: Coffee Shop Interior Design - My site
Pingback: Best Coffee in South Korea - My site
Pingback: Easy Coffee Recipes Without Milk - My site